
On the Home page, you can create and view tiles which illustrate a variety of specific information about the admissions process at your school.
Each user can create and customize the tiles that appear on their Home page, without affecting other users.
The Home Page
The first time on your Home page, you will see these default options (but no Tiles):
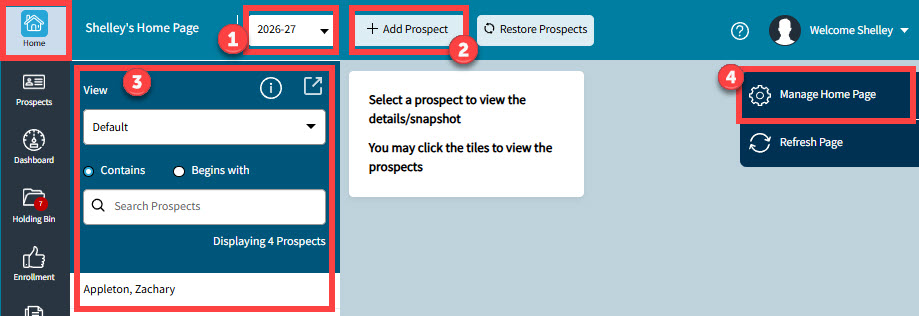
- Year drop down menu to filter the application year. A single year or "All Years" can be selected
- Add Prospect button. To manually add a prospect.
- List of Prospects. Filtering this list by using a view will not affect the data in the tiles you create. Clicking on a prospect's name will open the Prospects Screen.
- Manage Home Page specifications gear wheel. Click to open the Manage window (see next topic below).
Managing your Home Page - Creating & Editing Tiles
Clicking the gear wheel on the Home page will open this window where you can create and manage tiles:
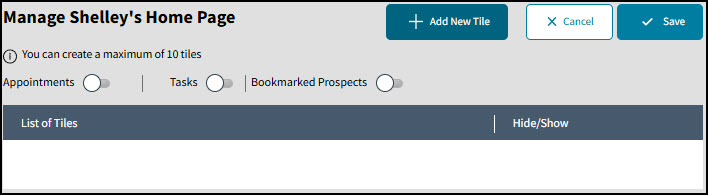
To create a tile, click the Add New Tile button, to get the Add New Tile window.
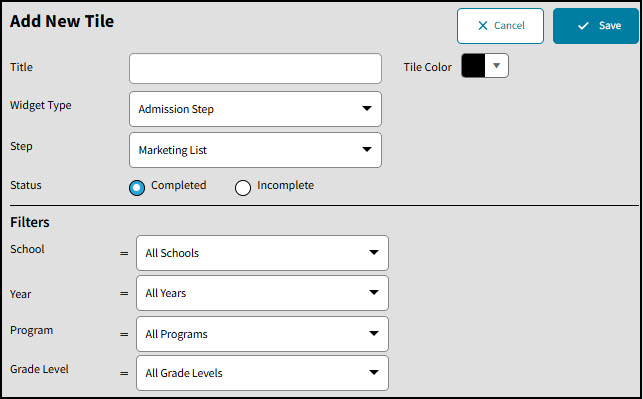
First, give the new Tile a title, then set the rest of the specifications based upon what information you want the Tile to show.
There are 4 types of Widgets:
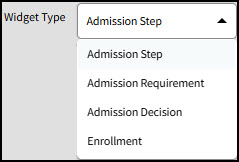 The Widget type determines the type of Tile you are creating.
Once you have selected the Widget Type, the next list will allow you to select the specific Step, Requirement, Decision, or Enrollment Status for this Tile.
The lists are coming directly from the Admissions setup that your school made.
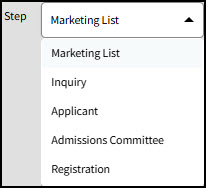
The next specification depends upon the choices you have already made.
The Admission Step and Admission Requirement Widgets allow you to make one last choice for the tile:


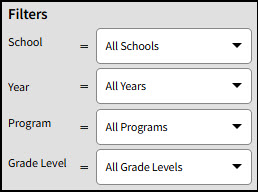
Once the Tile has been configured, the 4 Filters allow you to set which School, Year, Program and Grade Levels this Tile should work with.
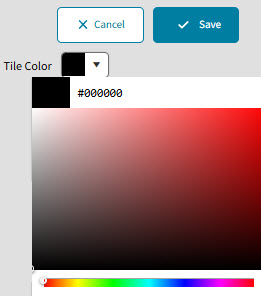
The last thing to configure before clicking the Save button is the color of the Tile.
Use the color picking tool, or type in the Hex #. Click the Save button to return to your Home page.
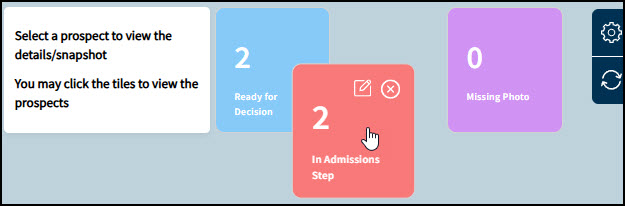
Once you have created tiles, you can change the order in which they appear by dragging and dropping them.
Use the edit pencil icon to edit the tile individually, or click the gear wheel and manage all tiles at the same time.
Click on a tile to open a list of prospects who meet that tile's filters.
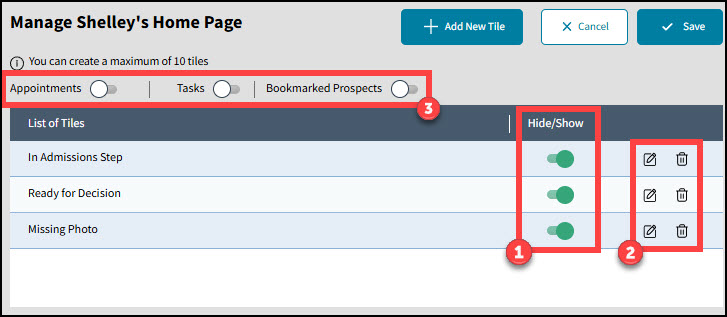
- Use the Hide/Show toggle to set the visibility for each Tile on the Home page
- Use the Edit icon to open the Tile's specifications and edit it. Use the Trash icon to delete the Tile.
- Use the 3 toggles at the top to turn on special charts showing Appointments, Tasks, or Bookmarked Prospects on your Home page.