
Overview
The Enter Student Daily Attendance screen can be used to edit existing attendance entries or add a new entry. You can also access the Batch and Quick Entry options from this screen. You may also delete entries for the currently viewed date.
Fig 1: Overview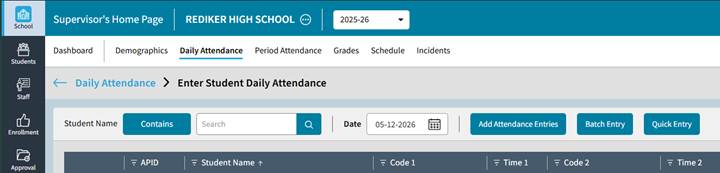
If you need to correct attendance entries from a previous date it can be done on this screen. Simply click on the Date (upper left) and choose a previous day. The entries appearing will be the attendance marks from the date chosen. You can then edit or delete attendance entries as needed.
Daily Attendance: Enter Students Daily Attendance
Edit Attendance
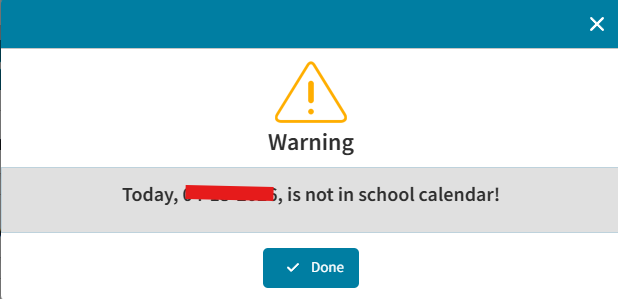
The steps are the same for both Students and Staff. Please note that before editing Student Attendance for today, you first need to have created the day on your calendar. For more information, please see the support article: Add a Day to the Calendar.
- On the Daily Attendance Screen (under School) in the Edit Student Attendance tile, click the navigate icon
 to navigate to the Enter Student Daily Attendance screen.
Fig 2: Edit Attendance – Step 1 (Edit Student Attendance Tile)
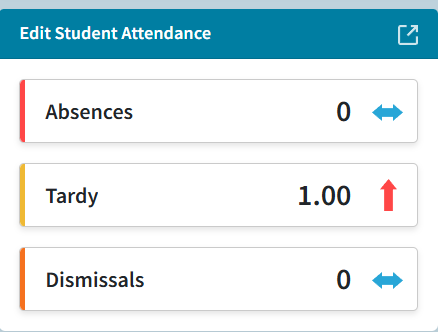
NOTE: If you have not created “today” in the calendar, the Edit Student Attendance tile will be blank (no numbers) and a popup indicating that today is not in the calendar will appear.
Fig 3: Edit Attendance – Step 1 (Today is not in the calendar warning)
- On Enter Student Daily Attendance screen you will see any attendance previously entered or received from the TeacherPlus Gradebooks. If no attendance marks have been entered for the active date, it will be empty.
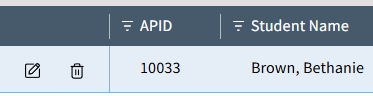
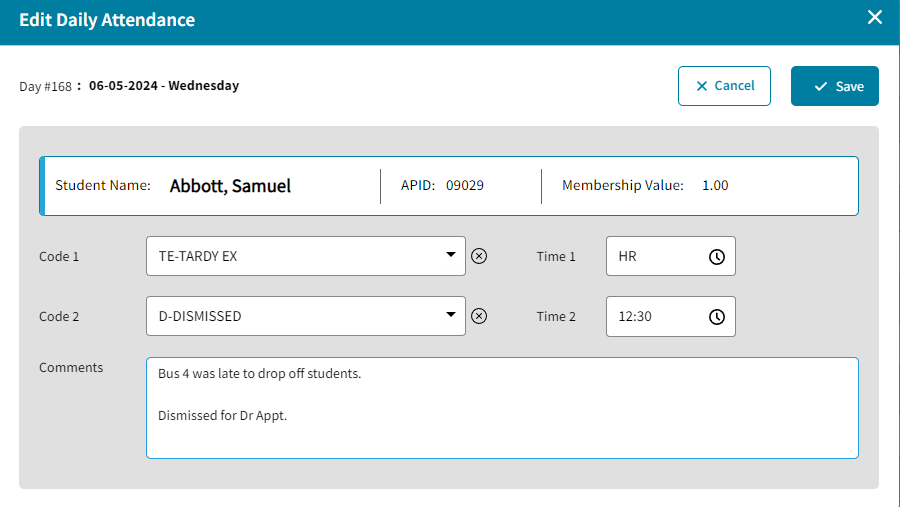
- To Edit an existing entry on the screen, select the Edit Icon on the far left (in front of the Student entry), and an Edit window will appear allowing you to change the Attendance Code(s) and edit the Comments. (see Diagram and Notes section below)
Fig 4: Edit Attendance – Step 3 (Edit an existing entry)
- To Add a new Attendance entry, click the Add Attendance Entries button. This will allow you search for a student, enter the Attendance code(s), and add a comment. (see Diagram and Notes section below). If you need to enter another student. Choose Save and Add Another.
Fig 5: Edit Attendance – Step 4 (Add Attendance Entries)

For Batch and Quick Entry see the support articles:
Daily Attendance Batch Entry
Daily Attendance Quick Entry
Diagram and Notes
See the Diagram and Table below for more information on Editing or Adding a new attendance entry.
Fig 6: Diagram and Notes
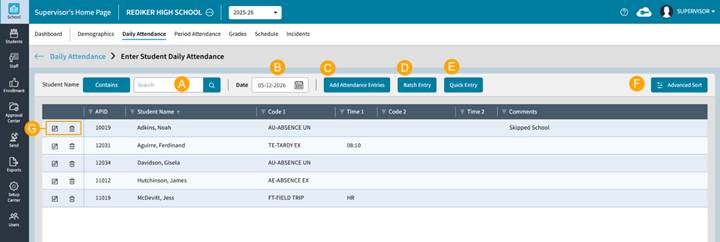
A) Click on a column header to choose which column to search on. By default, APID is selected. Click in the Search Box to search for data in the selected column.
B) Click in the Date box to select change to a past date in the calendar. This will allow you to view past attendance entries, as well as add or update existing attendance entries.
C) Click the Add Attendance Entries button to add attendance data for a student.
Search for the student by Name or APID. By default, Contains is selected when searching.
Fig 7: Diagram and Notes – Step C (Add Attendance Entries)
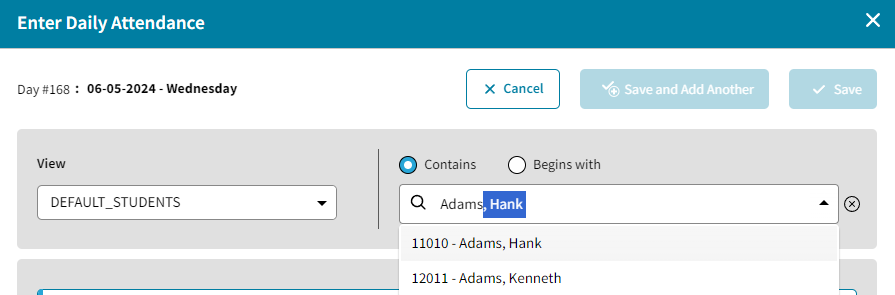
Check off Use Current Time if you would like the current time entered at the time the attendance entry is entered to be added.
Select a code from the dropdown menu in Code 1.
NOTE: If a code such as Tardy or Dismissed is selected for Code1 or Code 2, a default time of HR will be entered if Use Current Time is not selected. To clear HR, click X, then use the time picker to select a time in 5-minute intervals or manually enter a specific time using a 3 or 4-digit number (no colon) then tab or click out of the box and the time will be "calculated" based on the number. For example, 837 will enter 08:37 AM. If a military time is entered like 1300 then the time will appear as 01:00 PM.
Optional: Select a code from the dropdown menu in Code 2.
Click the Save button or Save and Add Another button if more attendance needs to be entered.
Fig 8: Diagram and Notes – Step C (Click the Save button)
D) Click the Batch Entry button to batch enter attendance data for students. For more information, refer to the suport article: Batch Entry.
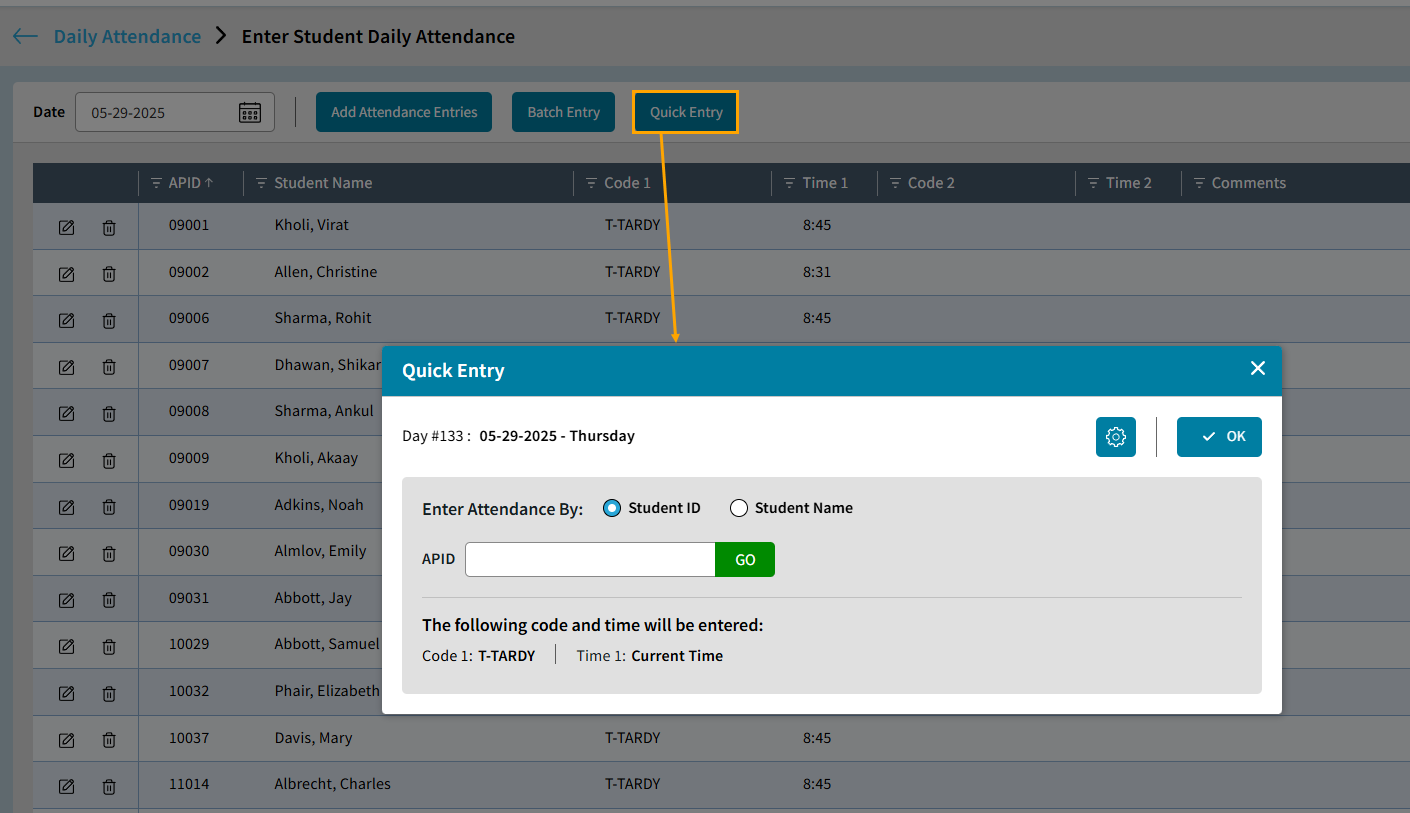
E) The Quick Entry button allows you to enter attendance by Student Name or Student ID.
To update the code and time entered for each student, select the gear icon. The Student Daily Attendance Settings window will open.
The Attendance Code, type of Student ID and Tardy Slip Settings can be updated.
For more information, refer to the support article: Daily Attendance Quick Entry.
Fig 9: Diagram and Notes – Step E (Click the Quick Entry button)
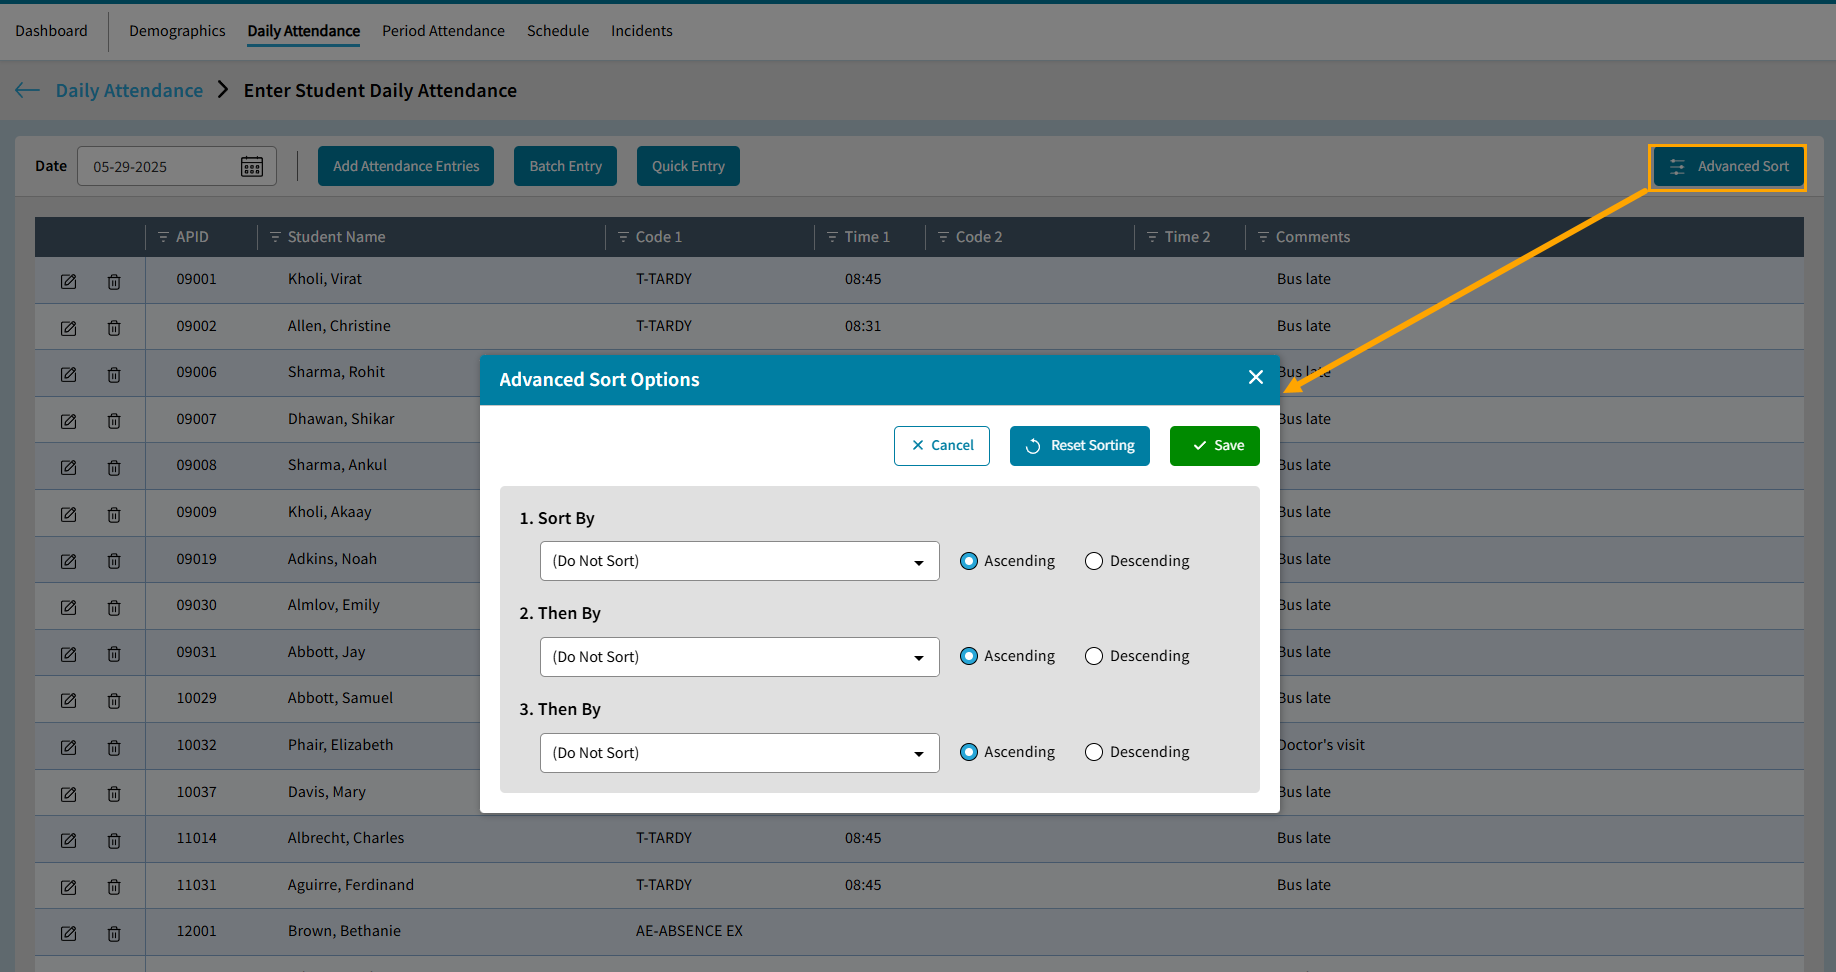
F) Click the Advanced Sort button to select up to 3 levels of sort from the options for Grade, Code and Name.
Fig 10: Diagram and Notes – Step F (Click the Advanced Sort button)
G) Click the Edit icon to edit an existing entry.
The Edit Daily Attendance window will open.
On this window you can edit the Attendance codes or times for Code 1, or Code 2, and edit the comments. To save your changes, click the Save button.
Fig 11: Diagram and Notes – Step G (Edit Daily Attendance window)
Click the Delete icon to delete an existing entry.