A | Demographics tab. |
B | The Birthday tile displays the number of Students and Staff that have birthdays for today's date. |
C | Generic SuperDB Tables created in classic Administrator's Plus can be viewed and edited in AdminPlus.com. Select the arrow or expand icon to open the SuperDB Screen:

For more information, see Generic SuperDB Tables. |
D | The School Information tile displays up to 10 School Information Fields, such as School Name, School Street and School City. To select different fields:- Click the
 gear icon. gear icon. - Use
 or or  to move fields to or from the Selected Fields column. to move fields to or from the Selected Fields column. - Click Save to save your changes.

All School Information Fields can be edited by selecting the expand icon. For more information, see Setup Center: School Information |
E | Receive from PlusPortals: This displays the counts for Student data Submitted, Approved, as well as Contacts Data Submitted and Approved. Select the Expand icon or select one of the counts to open the approval process, which displays the details.
 |
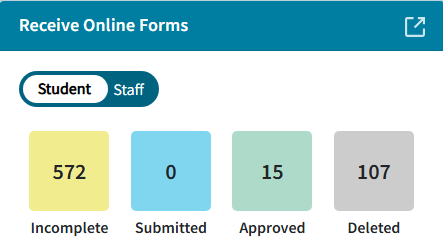
F | Receive Online Forms: This displays the counts for Student pre-populated Online Forms that are Incomplete, Submitted, Approved, and Deleted. Select the Expand icon or select one of the counts to open the approval process, which displays the details. Toggle to Staff to see the counts by status. 
|
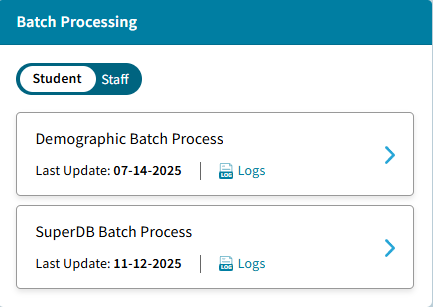
G | Batch Processing: Demographic Data
 - Batch Entry Student Data: Displays last Batch Entry Update. Select
 to view list of the last Batch Entry updates completed. Select a record and click View Log to download the log to Excel. See School Demographics: Batch Entry for Students for more information. to view list of the last Batch Entry updates completed. Select a record and click View Log to download the log to Excel. See School Demographics: Batch Entry for Students for more information.
- Batch Entry Staff Data: Displays last Batch Entry Update. Select
 to view list of the last Batch Entry updates completed. Select a record and click View Log to download the log to Excel. See School Demographics: Batch Entry for Staff for more information. to view list of the last Batch Entry updates completed. Select a record and click View Log to download the log to Excel. See School Demographics: Batch Entry for Staff for more information. - Batch Erase for Students of Staff: The option the Batch Erase data is also available for both Students and Staff. See School Demographics: Batch Erase for more information.
- SuperDB Batch Process: Displays last Batch Entry Update. Select
 to view list of the last Batch Entry updates completed. Select a record and click View Log to download the log to Excel. See School Demographics: Batch Processing for more information on how to Add, Edit or Delete SuperDB Records. to view list of the last Batch Entry updates completed. Select a record and click View Log to download the log to Excel. See School Demographics: Batch Processing for more information on how to Add, Edit or Delete SuperDB Records.
|
H
| Import 
- Student Demographic Import: Update existing Student data using a CSV (Comma-delimited) or TXT (Tab-delimited) file. Select Logs to view the logs for past imports. For more information see Student Demographic Import.
- Staff Demographic Import: Update existing Staff data using a CSV (Comma-delimited) or TXT (Tab-delimited) file. Select Logs to view the logs for past imports. For more information see Staff Demographic Import.
- SuperDB Import for Student or Staff: Update existing SuperDB tables using a CSV (Comma-delimited) or TXT (Tab-delimited) file. Select Logs to view the logs for past imports. For more information see SuperDB Import for Student or Staff.
- Student Contacts Import: The Student Contact Import allows the AdminPlus Supervisor to add student contacts or update existing student contact using a CSV (Comma-delimited) or TXT (Tab-delimited) file. For more information about updating Student Contacts, see Student Contacts Import.
- Generic SuperDB Import: Update existing Generic SuperDB tables using a CSV (Comma-delimited) or TXT (Tab-delimited) file. Select Logs to view the logs for past imports. For more information see Generic SuperDB Import.
|
I | Households: The Household Tile displays statics for Households in School, Students Not Yet in a Household, and Household Audit.
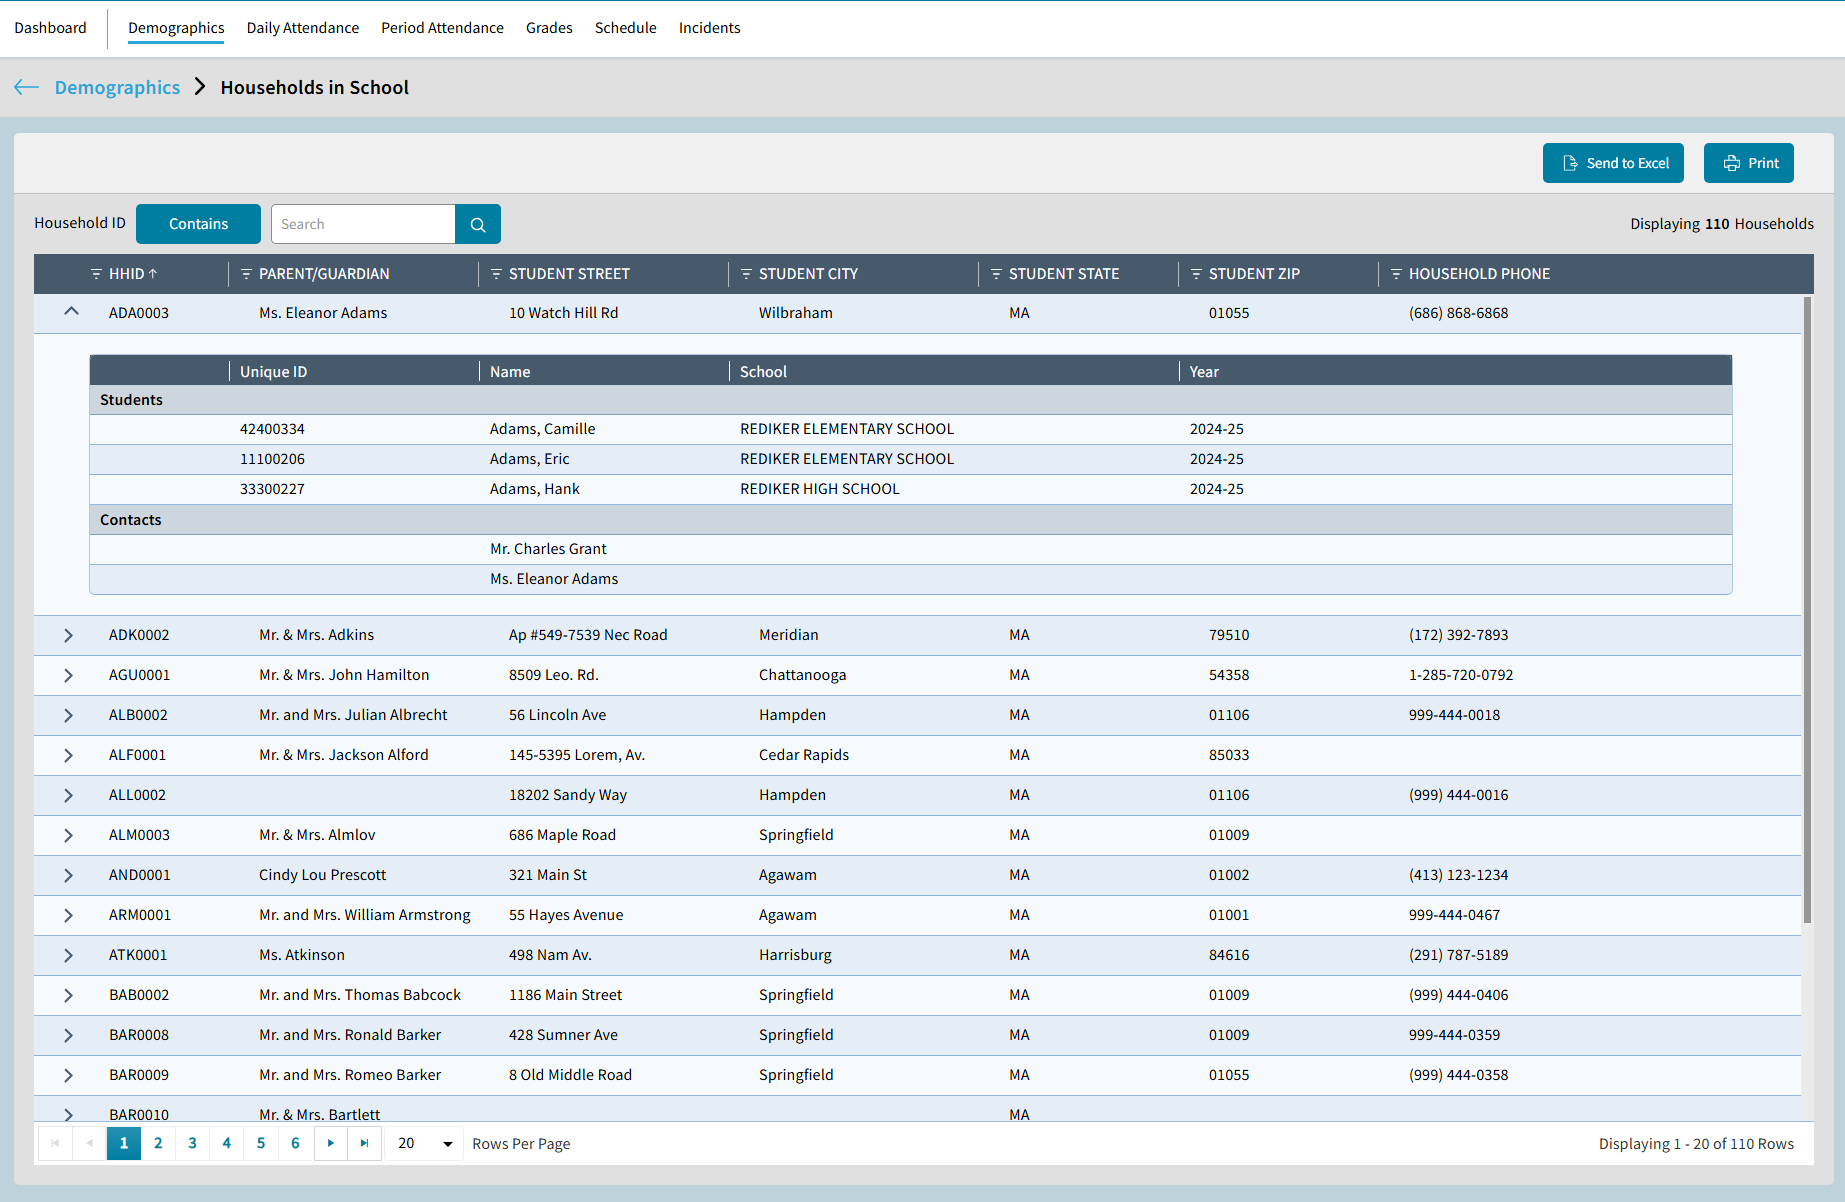
 - Households in School displays the number of households associated with the number of Active Students in the school. Click the number to view the details for each household. A new window opens, displaying the households. On default, the first household is expanded. Click to expand additional household details including the students associated with the contact, their UNID, the school they are enrolled in and the year. The Household List can be Sent to Excel or Printed; however, the Household details (students and contacts) will not be included.
 - Students Not Yet in a Household displays the students who do not have a Household ID. Click on the number to display the list of students. Click on
 to assign a Household ID to the Student without leaving the list. to assign a Household ID to the Student without leaving the list.
 - Household Audit : Users can run a Household Audit in the Households tile by selecting Run Audit. This identifies households with one or more data mismatches across field values, helping ensure data consistency. Once run, refer to the number displayed for Households Not in Sync. Select the number to view each household not in sync. Only the Supervisor user can synchronize households.

|
J | Contacts: This section displays Contact Analytics, including the following:- Master Contact: Displays the total number to contacts in the system. Select the number to view all master contacts.
 Layout Options can be used to Manage Master Contact Layouts Layout Options can be used to Manage Master Contact Layouts
 - Not Linked with Students: Displays the number of contacts that are not associated with any student. Select the number to view the list.
 - No Primary E-Mail: Shows the number of contacts missing a primary e-mail address. Select the number to view.
 - Same Primary E-Mail: The total number of contacts that share the same e-mail address. Select the number to view.
|
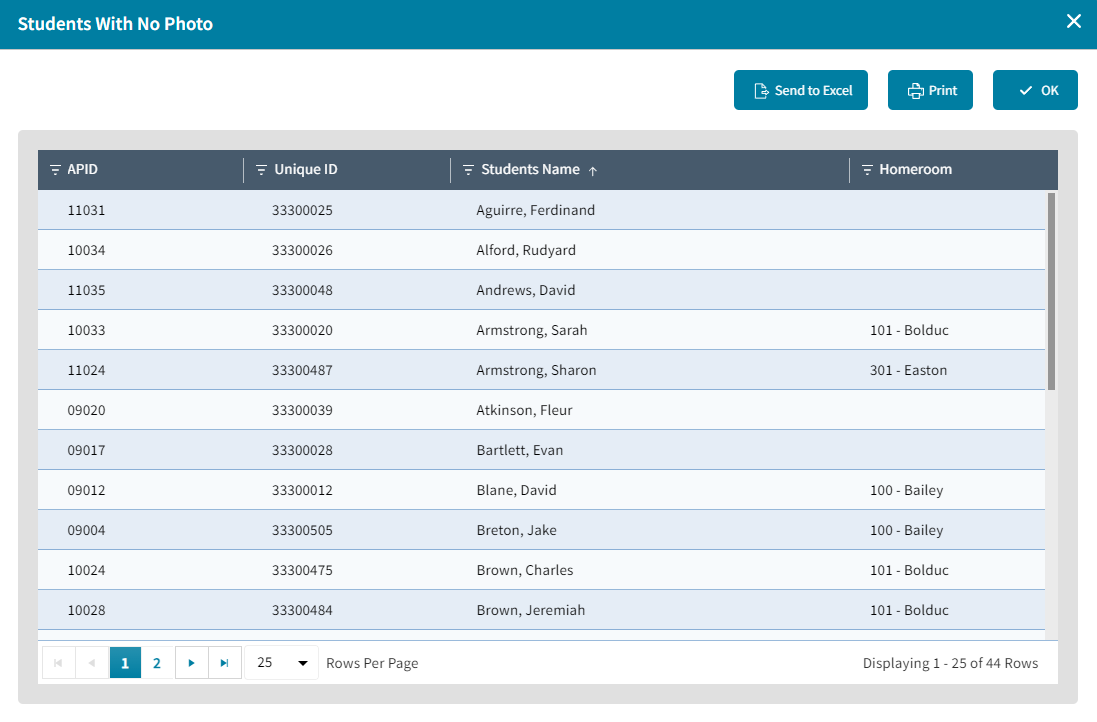
K | Members with No Photo: While on the School > Demographics screen, users can view which members do not have a photo. Select the number to view a report for either Students or Staff members.

The Students/Staff with No Photo window opens. Select Send to Excel to download the report to Excel. Select Print to generate a PDF of the report, which can be saved or printed.
 |


 to view list of the last Batch Entry updates completed. Select a record and click View Log to download the log to Excel. See


 Layout Options can be used to Manage Master Contact Layouts

