In addition to posting class announcements and alerts, you can communicate with students and parents by sending e-mails or messages. To learn more, see the sections below.
Important: You will only see the E-Mail & Messages tab or the E-Mail tab if your PlusPortals administrator has enabled it.
E-Mails In TeacherPlus Portal
You can communicate with school staff, students, parents, and groups using your portal e-mail. Your e-mails are delivered to the recipients' personal e-mail and portal e-mail.
See the following topics for e-mail tasks:
View E-Mails
You can view all your portal e-mails or just new ones.
All E-Mails
On the Master menu, click E-Mail & Messages or E-Mail to open the E-Mail tab.
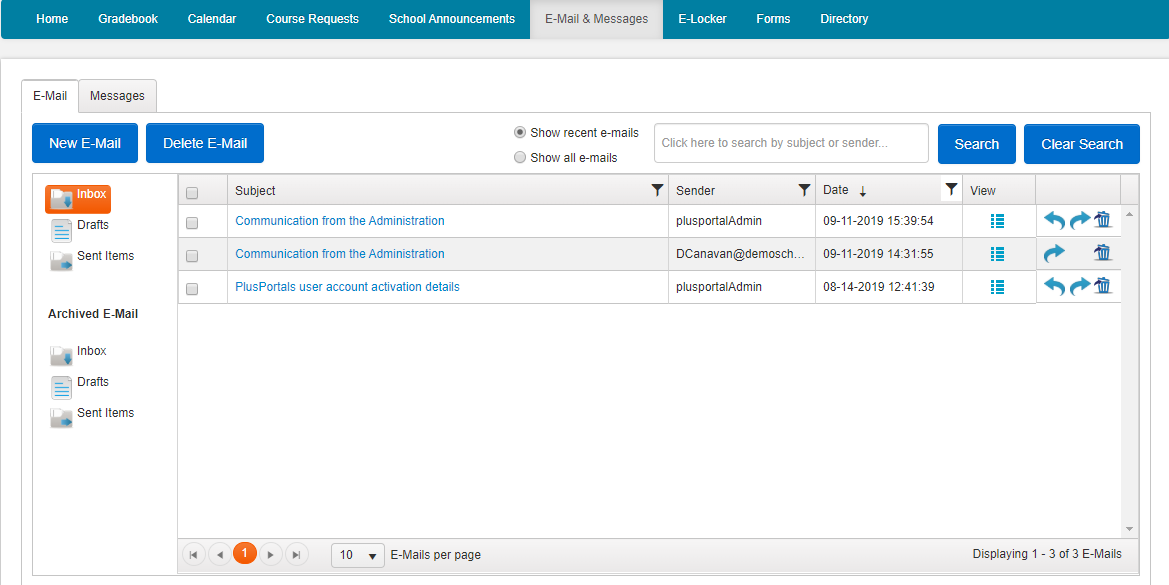
The diagram and table below provide an overview of the E-mail tab.

E-Mail Tab Overview | |
| A | Switch between e-mails and messages. |
| B | Compose or delete e-mails. |
| C | Display only recent e-mails or display all e-mails. |
| D | Search e-mails by subject or sender, or clear your search history. |
| E | Access your inbox, e-mail drafts, or sent e-mails. |
| F | View your Inbox, Drafts, or Sent Items folder. Click an e-mail to open it. |
| G | Filter your e-mails by subject, sender, or date sent or received. |
| H | Open an e-mail ( |
| I | Access archived e-mail from previous school years. |
| J | Browse forward and back through pages of e-mails. |
| K | Select how many e-mails display per page. |
New E-Mails
On the Home tab and Class page, you'll see a number next to ![]() when you have a new e-mail. The number indicates how many new e-mails you have. To view them, click
when you have a new e-mail. The number indicates how many new e-mails you have. To view them, click ![]() .
.
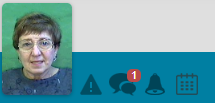
By default, the number disappears after you read the e-mail.
To show an e-mail as unread, clear the check mark in theMark as read check box.
Send an E-mail from Your Portal
To send an e-mail to school staff, students, parents, and groups, follow these steps:
- On the Master menu, click the E-Mail & Messages tab or the E-Mail tab.
- On the E-Mail tab, click New E-Mail. The New E-Mail dialog box opens.

- See the diagram and table for a description of the New E-Mail dialog box.

New E-Mail Dialog Box | |||||||||||
A |
Important: Recipients in the To field only see their own names. Copied recipients are visible to all recipients. Blind-copied recipients are hidden from other recipients.
Note: You can select more than one group of recipients.
The Select Recipients dialog box lists the recipients selected to receive the e-mail and identifies recipients with invalid e-mail addresses.
| ||||||||||
B | Type a subject for the e-mail. | ||||||||||
C | Attach a file to the e-mail. Important: The file size limit for e-mail attachments is 10 MB. | ||||||||||
D | Type the email, formatting the text and adding links and images as needed. | ||||||||||
E | Include an e-mail signature. | ||||||||||
F | Save a draft of the e-mail. To view the draft, click Drafts on the left side of the E-Mail tab. | ||||||||||
G | Send the e-mail. | ||||||||||
H | Return to the E-Mail tab without saving the e-mail. |
Automatically Send E-mail Notifications
When you post content to your class page or edit existing content, you can send an e-mail notification to parents and/or students. After you save the content, click Send E-Mail Notification.
See the diagram and table below for descriptions of the e-mail notification options.

Reply to an E-mail
To reply to an e-mail, follow these steps:
- On the E-Mail tab, click
 for the e-mail you're replying to.
The PlusPortals dialog box opens.
- Click above the original message and type your reply, formatting the text and adding links and images as needed.
- Click Send.
Tip: You can save a draft of your e-mail by clicking Save. To view the draft, click Drafts on the left panel of the E-Mail tab.
Forward an E-mail
To forward an e-mail, follow these steps:
- On the Master menu, click the E-Mail & Messages tab or the E-Mail tab.

- Click
 next to the e-mail you want to forward.
The New E-Mail dialog box opens.

- Click Add Recipients.
- In the Select Recipients dialog box, click a recipient group, select the check boxes for the recipients, and then click Next.

The dialog box lists the recipients selected to receive the e-mail and identifies recipients with invalid e-mail addresses.
- Click OK.
- To add your own message to the recipients, click above the original message and begin typing.
- Click Send.
Tip: You can save a draft of your e-mail by clicking Save. To view the draft, click Drafts on the left panel of the E-Mail tab.
Delete an E-mail
To delete e-mails from your Inbox, Drafts folder, Sent Items folder, or one of the Archived E-mail folders, follow these steps:
- On the Master menu, click the E-Mail & Messages tab or the E-Mail tab.

- Do one of the following steps:
- To delete one e-mail, click
 .
. - To delete multiple e-mails, select the check box for each e-mail and click Delete E-Mail.

- Click Yes to confirm the deletion, and then click OK.
Messages in TeacherPlus Portal
You can communicate with an individual student and/or parent or an entire class and/or their parents using messages. Portal messages are sent to the recipient's portal.
See the following topics for message tasks:
View Messages
You can view all your portal messages or just new ones.
All Messages
On the Master menu, click the E-Mail & Messages tab or the Messages tab.
Important: You will only see the E-Mail & Messages tab or the Messages tab if your PlusPortals administrator has enabled it.
If not already displayed, click the Messages tab. The diagram and table provide an overview of the Messages tab.

Messages Tab Overview | |
| A | Switch between e-mails and messages. |
| B | Compose messages. |
| C | View your messages. |
| D | Filter your messages by name, date sent or received, or status (sent or received). |
| E | Open a message. |
| F | Reply to a message or delete a message. |
| G | Browse forward and back through pages of messages. |
| H | Select how many messages display per page. |
New Messages
On the Home tab and Class page, you'll see a number next to ![]() when you have a new message. The number indicates how many new messages you have. To view them, click
when you have a new message. The number indicates how many new messages you have. To view them, click ![]() .
.

By default, the number disappears after you read a message.
To show a message as unread, clear the check mark in the Mark as read check box.
Send a Message to Students and Parents
You can send messages to students and parents, which they can view from their respective portals.
To send a message, follow these steps:
- On the Master menu, click the E-Mail & Messages tab or the Messages tab.

Important: You will only see the E-Mail & Messages tab or the Messages tab if your PlusPortals administrator has enabled it.
- If not already displayed, click the Messages tab.

- Click New Message.
The New Message dialog box opens. - See the diagram and table below for a description of the New Message dialog box.

New Message Dialog Box | |
A | Type a title for the message. |
B | Type your message, formatting the text and adding links and images as needed. (See Edit Content.) |
C | Send the message to students, and/or their parents. For parents, click All Parents or Only to Primary Parent from the drop-down list. |
D | Select the check box for each section you want to send the message to, or select the check box for each student you want to send the message to. |
- Click Send.
Reply to a Message
To reply to a message, follow these steps:
- On the Messages tab, click Reply for the message you're replying to.

The Reply dialog box opens with the title of the original message displayed in Subject.

- Click above the original message and type your reply, formatting the text and adding links and images as needed.
- Click Send.
Delete a Message
To delete a message, follow these steps:
- On the Master menu, click the E-Mail & Messages tab or the Messages tab.

- If not already displayed, click the Messages tab.

- For the message you want to delete, click Delete.
- Click Yes to confirm the deletion, and then click OK.