Import a File
Sometimes an Admissions Office will have a file of "prospective prospects" to import into Admissions.
This can happen, for example if the local middle schools send the high school excel files of their current eighth graders.
This group of students are not yet prospects, but could be. Schools choose to import these prospective prospects into Admissions so that they can have their contact information already in the system for marketing and mailings. Typically, when this practice is used, a requirement for "Serious Prospect" is set up in an "Inquiry" step. The "Serious Prospect" requirement is not marked as complete until the prospect who was imported from this list does something to indicate they want to come to the school.
You can import a csv or txt file using the Default Template or, if you anticipate reusing the file's import specifications, you can create a template as you import the file.
- On the left navigation menu, click
 Import.
 - Do either of the following:
- To import a file using the Default Template, click Default Template. Continue to step 4.
- To import a file and create a template with its specifications, click Add Template.
- Type a Template Name and, optionally, a Description of the template.
- Next to Import File Path, click
 . Select the file you want to import.
 - For Import File Type, click either Comma Separated (csv file) or Tab Delimited (txt file).
- For Header lines to ignore (including blank lines), type the number of lines to ignore when importing the file.
- For Header line that contains field names, if any, type the line number that contains field names.
- For Fields per record, type the number of columns that contain data.
- Optional: To allow blank data in the file to replace existing data for prospects, select the Allow blanks to overwrite existing data check box.
- For the settings under Mapping of the import fields to AdmissionsPlus, refer to the following diagram and table.

Set the School, Program, Grade Level, and Year ADo either of the following:
- If the information in the file differs for prospects, click Multiple for the specification. For example, if the prospects are in different grades.
- If the information in the file is the same for all prospects, click Single for the specification. For example, if all the prospects are applying to the same program.
BDo either of the following:
- If you clicked Multiple, in the drop-down list, select the field in the file that contains the prospects' information for that specification.
- If you clicked Single, in the drop-down list, select the AdmissionsPlus data that applies to all prospects in the file.
- Under Set primary and secondary keys, do the following:
- In the Primary key field in the import file drop-down list, select a field from the file with data that uniquely identifies prospects.
- In the Primary key in AdmissionsPlus drop-down list, select the AdmissionsPlus field that corresponds to the file field you chose.
- Optional: Under Select fields for secondary key check, do the following:
- In the Field in Import File drop-down lists, select fields from the file with data that uniquely identifies prospects.
- In the Field in AdmissionsPlus drop-down lists, select fields that correspond to the file fields you chose.
- On the [Demographic/Admission/Contact] Fields tab, in the Fields from filecolumn, click the row and select the file field that matches the AdmissionsPlus field.
If the file being imported contains data for more than one contact, click Add Contact. Click the Contact [#] Fields tab, and match the fields between the file and AdmissionsPlus.

- To prevent a duplicate prospect from being imported into AdmissionsPlus, do the following:
- Click Select Fields for Contact Comparison.
- Select the check boxes for the contact fields whose data you want to compare between the file and AdmissionsPlus, and then click Save.
- If you are creating a template with these specifications, click Save.
- Click Next. The Import Wizard dialog box opens.
- Select the check boxes next to the prospects you want to import, or select the check box in the header to import all prospects.
You can click a prospect in the main table to view their information in the Demographic Fields and Contact Details tables.
- Click Save.
Import using a Template
You can import a file using a template you created by following these steps:
- On the left navigation menu, click
 Import Wizard.
 - Click the template you want to use.
- Next to Import File Path, click
 , and select the file you want to import.
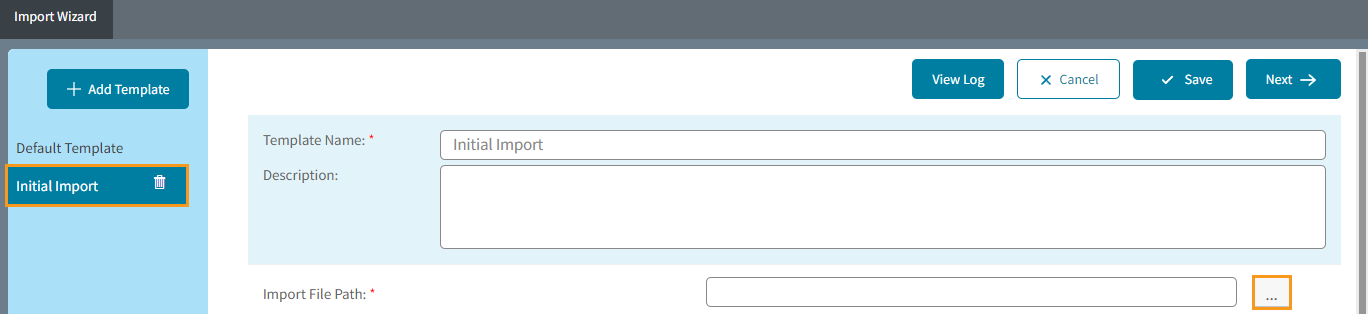
- Optional: To allow blank data in the file to replace existing data for prospects, select the Allow blanks to overwrite existing data check box.
- To prevent a duplicate prospect from being imported into AdmissionsPlus, do the following:
- At the bottom of the page, click Select Fields for Contact Comparison.
- Select the check boxes for the contact fields whose data you want to compare between the file and AdmissionsPlus, and then click Save.
- Click Next. The Import Wizard dialog box opens.
- Select the check boxes next to the prospects you want to import, or select the check box in the header to import all prospects.
Tip: You can click a prospect in the main table to view their information in the Demographic Fields and Contact Details tables. - Click Save.